
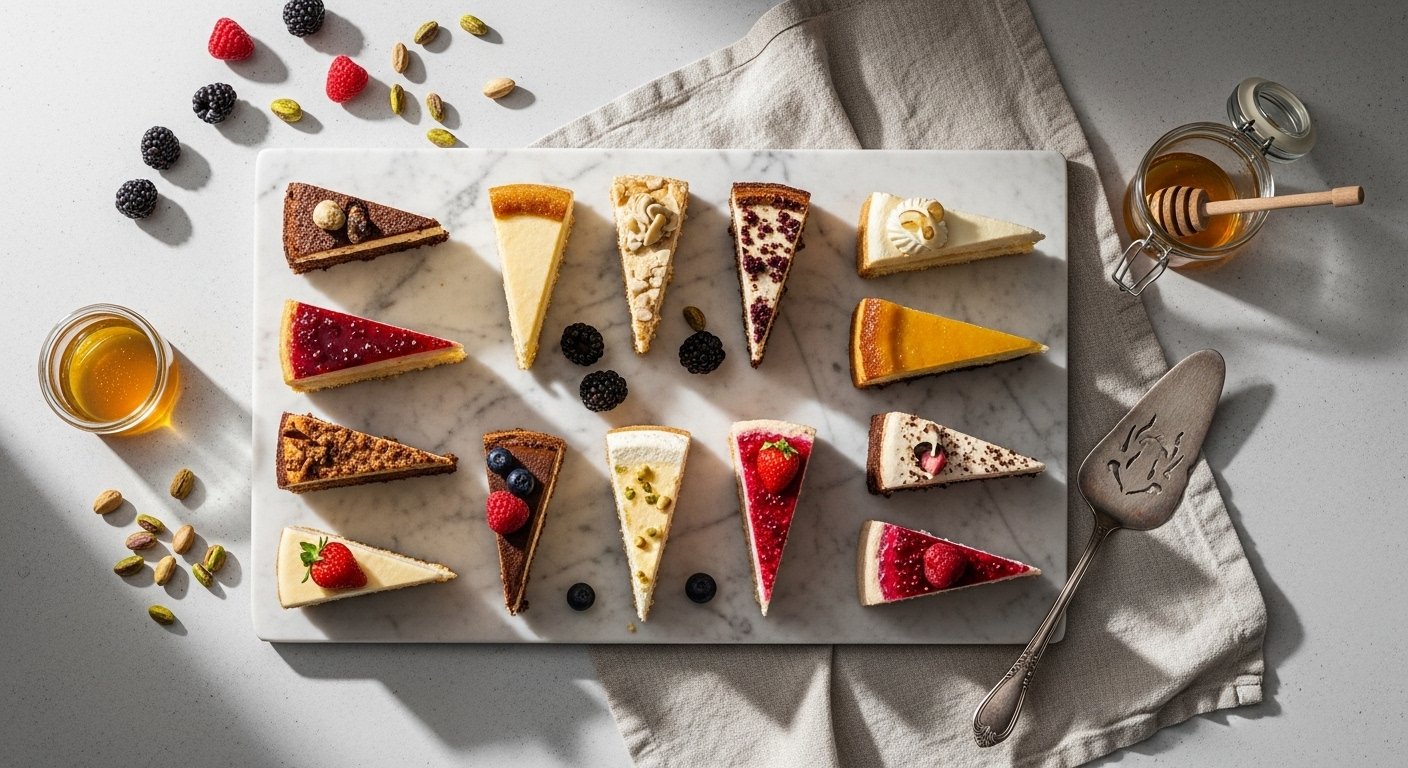
You know that moment when you need a showstopping dessert but don’t want to stress through complicated steps? These Cake Recipes are built for that exact day — they impress guests, stay reliable, and teach you techniques that make every bake better.
This roundup features 12 foolproof cake recipes, from a luxe pistachio layer cake to a cozy Baileys & Guinness boozy cake and a zingy yuzu sponge. Each recipe gives clear ingredient lists, step-by-step instructions, and helpful tips for getting texture and flavor right. Expect a mix of classic from-scratch builds and smart shortcuts that still taste homemade.
I often whip batters in my KitchenAid stand mixer but a sturdy hand mixer will do the job. Line your pans with parchment paper so cakes lift cleanly every time. Ready to make Cake Recipes that always impress? Let’s get baking.
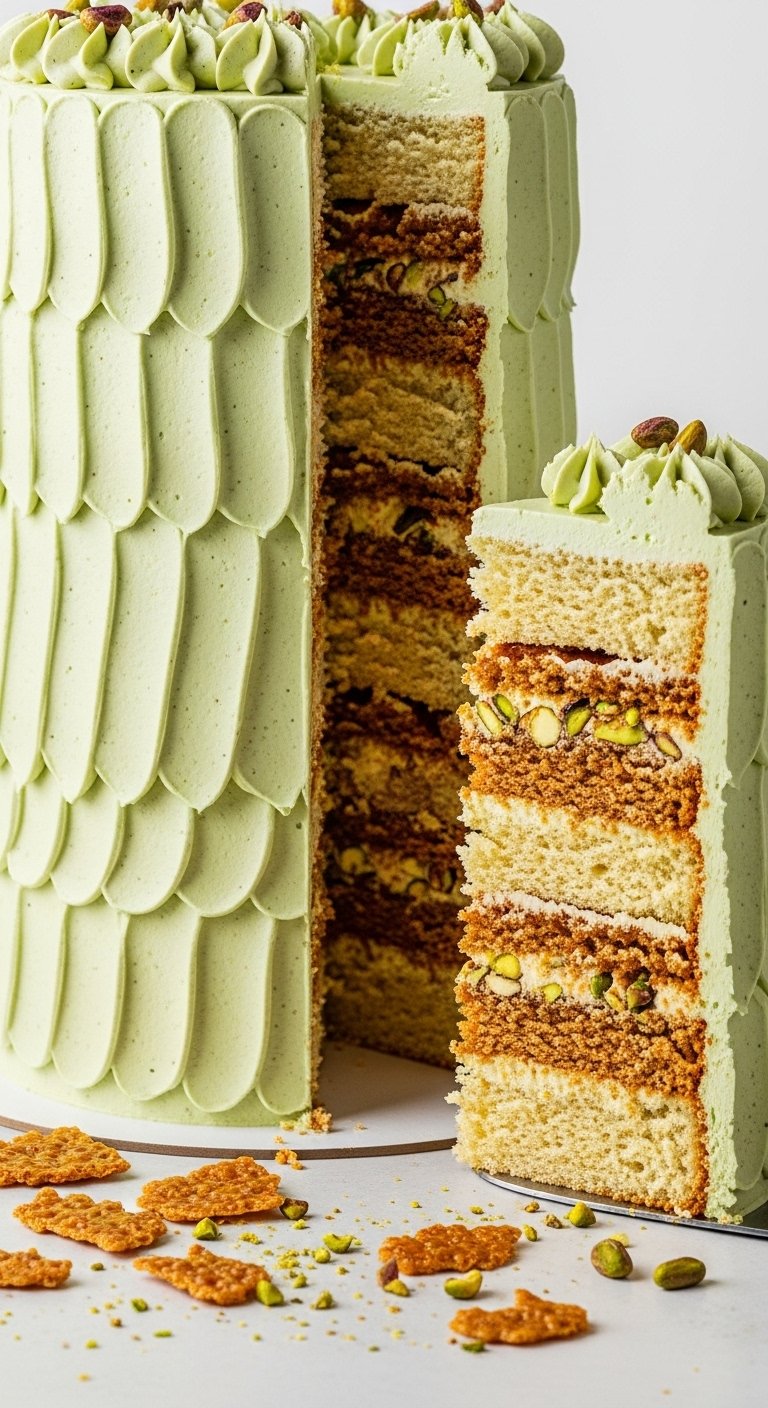
1. Pistachio Layer Cake Recipe
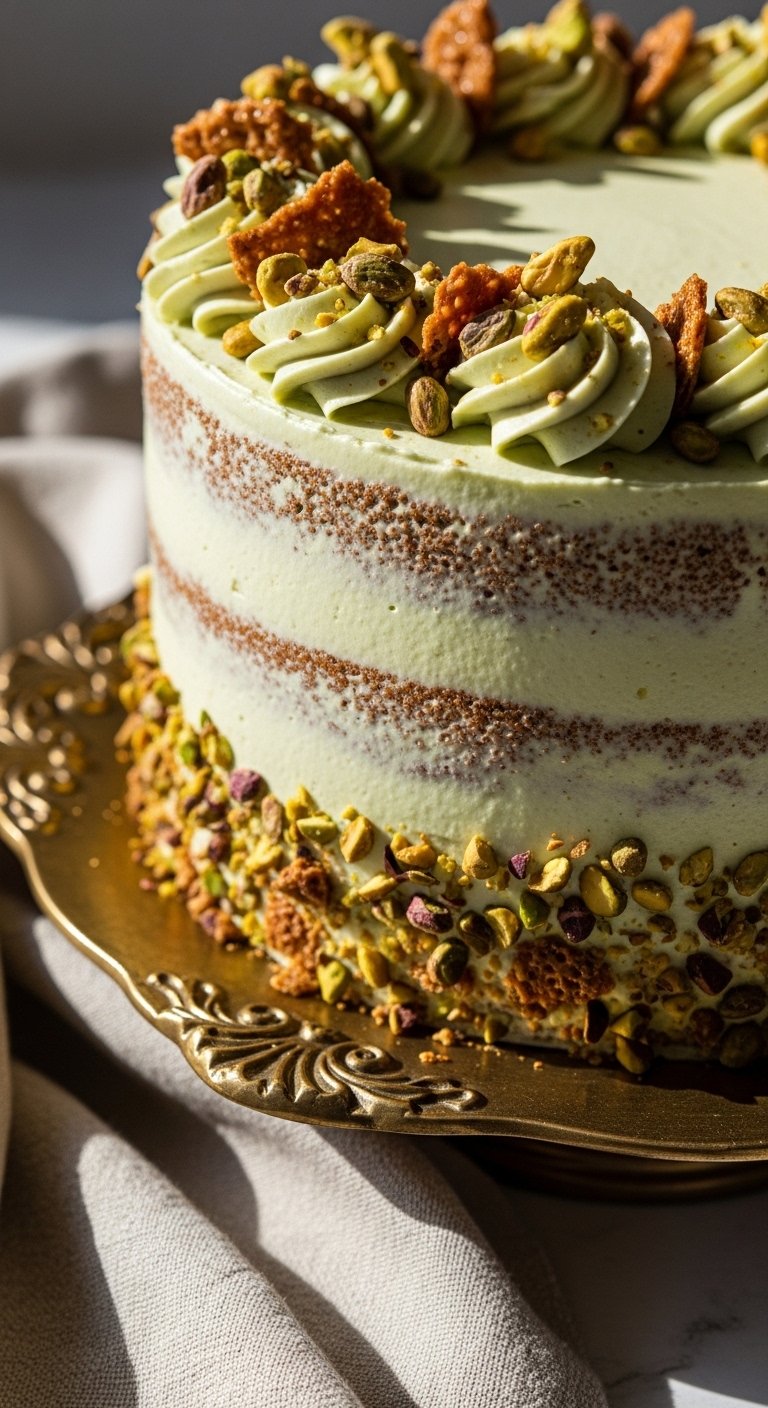
This pistachio layer cake has a delicate green crumb, nutty depth from pistachio paste, and a crunch layer for contrast. The flavor is nut-forward but not cloying, with a silky Swiss-style buttercream that keeps slices neat. Perfect for birthdays or a luxe afternoon tea, it smells of toasted nuts and brown butter if you choose to brown it. Home bakers who love texture and refined flavors will adore this recipe.
Ingredients
- 2 1/2 cups (320 g) cake flour
- 1 1/2 tsp baking powder
- 1/2 tsp baking soda
- 1/2 tsp fine salt
- 1 cup (226 g) unsalted butter, room temperature
- 1 1/4 cups (250 g) granulated sugar
- 3 large eggs, room temperature
- 1 cup (240 ml) buttermilk, room temperature
- 1/2 cup (140 g) pistachio paste
- 1 tsp vanilla extract
- 1 cup (120 g) chopped toasted pistachios
- 1 cup feuilletine or crisp cornflake crunch
- For buttercream:
- 1 1/2 cups (340 g) unsalted butter, room temperature
- 6 cups (720 g) powdered sugar, sifted
- 1/4 cup (60 ml) heavy cream
- 1/2 cup (140 g) pistachio paste
- Pinch of salt
Instructions
- Preheat oven to 350°F (175°C). Grease and line three 8-inch cake pans with parchment paper.
- Whisk together cake flour, baking powder, baking soda, and salt. Set aside.
- In a bowl, beat butter and sugar until pale and fluffy (about 3–4 minutes) using a stand mixer or hand mixer.
- Beat in eggs one at a time, scraping down the bowl. Mix in pistachio paste and vanilla.
- Alternate adding dry ingredients and buttermilk in three additions, beginning and ending with dry. Mix until just combined.
- Fold in chopped toasted pistachios gently. Divide batter evenly into pans and smooth tops with an offset spatula.
- Bake 20–25 minutes or until a toothpick comes out with moist crumbs and edges are set. Cool cakes 10 minutes in pans, then turn out to wire racks to cool completely.
- For buttercream: beat butter until light, add powdered sugar gradually, then pistachio paste, cream, and salt. Beat until silky and spreadable.
- To assemble: place one layer on a cake board, spread a thin layer of buttercream, sprinkle a thin even layer of feuilletine for crunch, repeat and stack. Crumb coat, chill 20 minutes, then final coat and smooth.
- Chill 30 minutes before slicing. Doneness test: cake should spring back slightly and the skewer test should show moist crumbs.
How to Serve It
- Present slices on a white cake stand and garnish with whole toasted pistachios and a light dusting of powdered sugar.
- Pair with strong black tea or a mild coffee to balance nuttiness.
- Store leftover slices in airtight containers in the refrigerator for up to 4 days; bring to room temperature before serving.
- Make-ahead: bake layers 2 days ahead and freeze wrapped; thaw overnight in the fridge before assembling.
2. Matcha-Strawberry Layer Cake
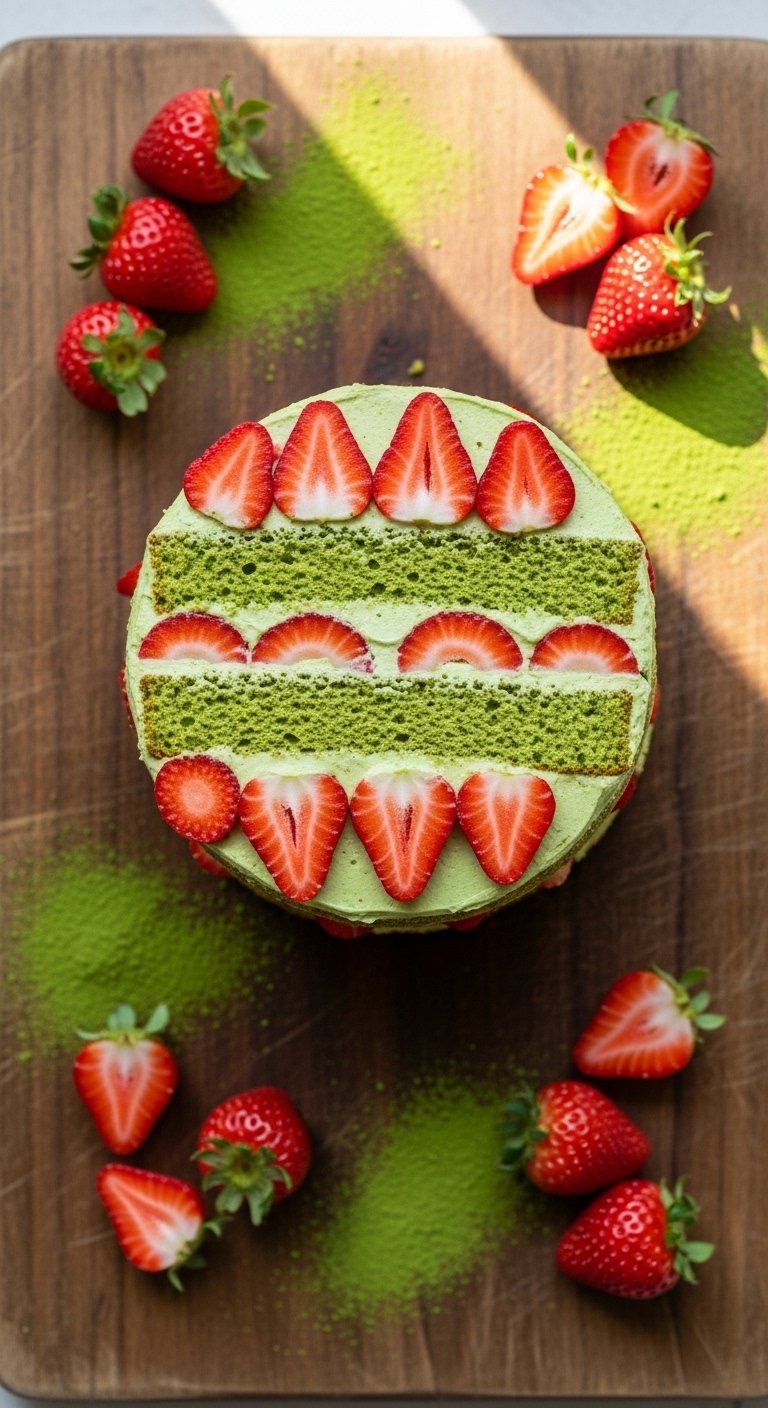
Earthy matcha pairs beautifully with bright, slightly tart strawberries in this modern fusion cake. The batter is light and sponge-like, while whipped matcha buttercream keeps sweetness in check. This is a great spring centerpiece — it looks fresh and smells of green tea and berries. If you love subtle grassy notes that meet fruit, this matcha cake recipe will become a go-to.
Ingredients
- 1 3/4 cups (220 g) cake flour
- 1 1/2 tsp baking powder
- 1/2 tsp salt
- 3 large eggs, room temperature
- 1 cup (200 g) granulated sugar
- 1/2 cup (120 ml) vegetable oil
- 1/2 cup (120 ml) milk, warm
- 2 tbsp (12 g) ceremonial-grade matcha powder
- 1 tsp vanilla extract
- 1 tbsp lemon juice
- 1 1/2 cups (360 ml) heavy cream
- 1/2 cup (60 g) powdered sugar
- 1 cup fresh strawberries, sliced
- For matcha buttercream (optional):
- 1 cup (226 g) unsalted butter, room temperature
- 3–4 cups (360–480 g) powdered sugar
- 2 tbsp matcha powder
- 2–3 tbsp heavy cream
Instructions
- Preheat oven to 350°F (175°C). Line two 8-inch pans with parchment paper.
- Sift together flour, baking powder, salt, and matcha into a bowl.
- Whisk eggs and sugar until pale and slightly thick. Add oil and vanilla, whisk to combine.
- Stir warm milk and lemon juice into batter, then fold in dry ingredients until smooth.
- Divide batter between pans and bake 18–22 minutes, until a toothpick shows moist crumbs and tops spring back.
- Cool 10 minutes in pans then turn out to wire racks.
- For whipped filling: whip heavy cream with powdered sugar until medium peaks; fold in sliced strawberries.
- If using buttercream, beat butter then add powdered sugar and matcha with cream until spreadable.
- Assemble: layer cake, pipe or spread whipped strawberry cream, top with second layer and chill 15 minutes to set.
- Use an offset spatula to spread frosting evenly and a bench scraper for sharp edges.
How to Serve It
- Garnish with halved strawberries and a dusting of matcha for a bright finish.
- Serve with jasmine tea or chilled sparkling water with lemon.
- Refrigerate in airtight containers for up to 3 days; whipped cream filling softens, so serve within 48 hours for best texture.
- Make-ahead: bake and freeze layers up to 1 month; thaw in fridge before assembly.
3. Sweet Heat Chili Chocolate Cake
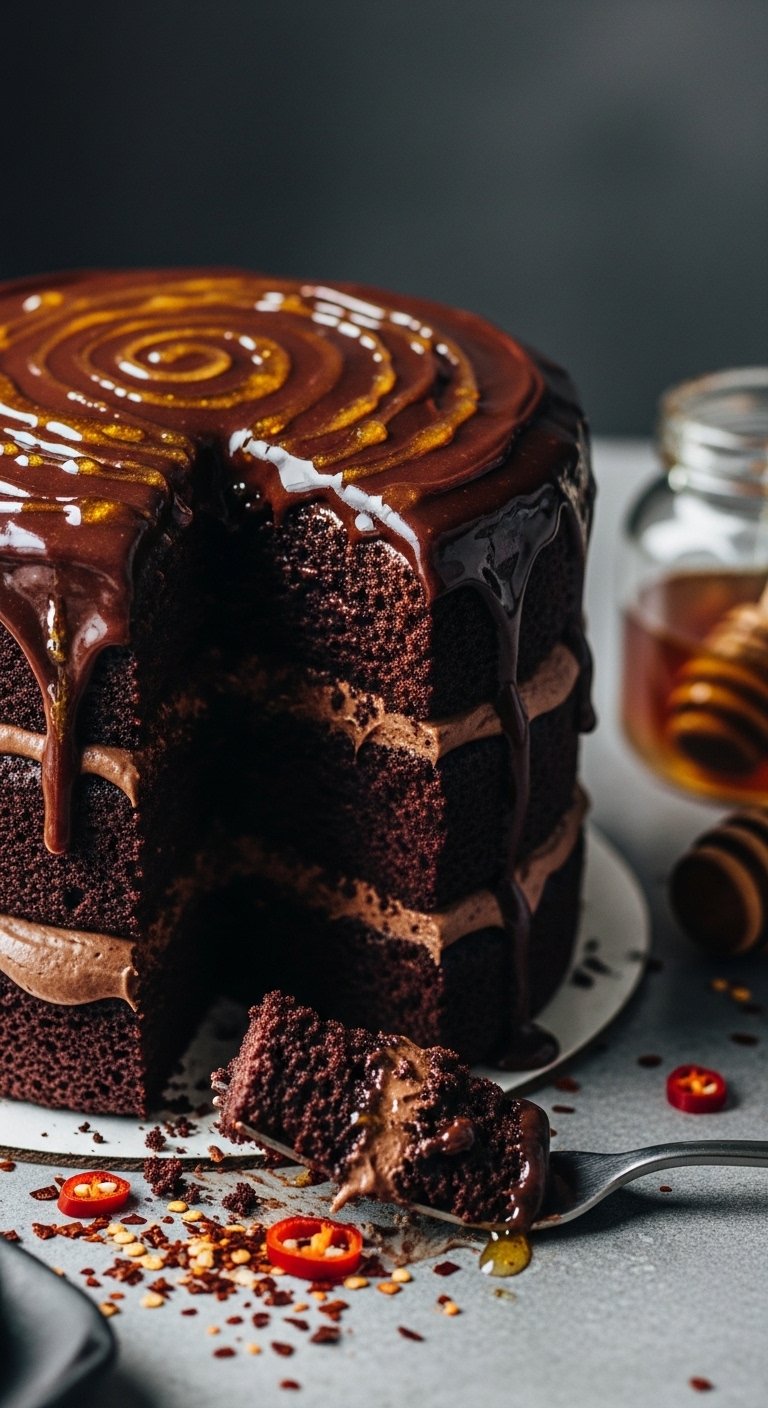
This chocolate cake brings the “swicy” trend to dessert: rich cocoa with a warming streak of chili and a sticky hot honey glaze. The chocolate base is tender with a slight chew from espresso in the batter, and the ganache is silky with a back-of-the-throat heat. People who like bold contrasts — sweet, bitter, and spicy — will love this cake.
Ingredients
- 1 3/4 cups (220 g) all-purpose flour
- 3/4 cup (75 g) cocoa powder, unsweetened
- 2 cups (400 g) granulated sugar
- 1 1/2 tsp baking powder
- 1 1/2 tsp baking soda
- 1 tsp fine salt
- 2 large eggs, room temperature
- 1 cup (240 ml) whole milk
- 1/2 cup (120 ml) vegetable oil
- 1 cup (240 ml) hot brewed espresso or strong coffee
- 2 tbsp apple cider vinegar
- 1 tsp cayenne pepper (adjust to taste)
- For ganache:
- 10 oz (280 g) dark chocolate, chopped
- 1 cup (240 ml) heavy cream
- 2 tbsp hot honey, plus more for drizzle
- Pinch flaky sea salt
Instructions
- Preheat oven to 350°F (175°C). Grease and line two 9-inch round pans.
- Whisk flour, cocoa, sugar, baking powder, baking soda, salt, and cayenne together.
- In another bowl, whisk eggs, milk, oil, espresso, and vinegar.
- Combine wet and dry until smooth. Divide batter and bake 30–35 minutes or until toothpick shows moist crumbs.
- Cool in pans 10 minutes, then transfer to racks.
- For ganache: heat cream until steaming, pour over chopped chocolate and let sit 2 minutes, stir until glossy. Stir in hot honey and salt.
- Cool ganache slightly until pourable but not runny. Sandwich layers with a thin spread of ganache, pour top coat and smooth with an offset spatula.
- Finish with a drizzle of additional hot honey and a few flakes of sea salt. Let set 20–30 minutes.
- Doneness check: center should be springy and skewer shows moist crumbs.
How to Serve It
- Serve with a drizzle of hot honey and a dusting of cocoa; a scoop of vanilla bean ice cream balances the heat.
- Pair with a robust stout or black coffee to double down on roasted notes.
- Store covered in the fridge for up to 4 days in airtight containers; bring to room temperature before serving.
- For parties, make ganache the day before and warm slightly before using.
4. Baileys & Guinness Boozy Chocolate Cake Recipe
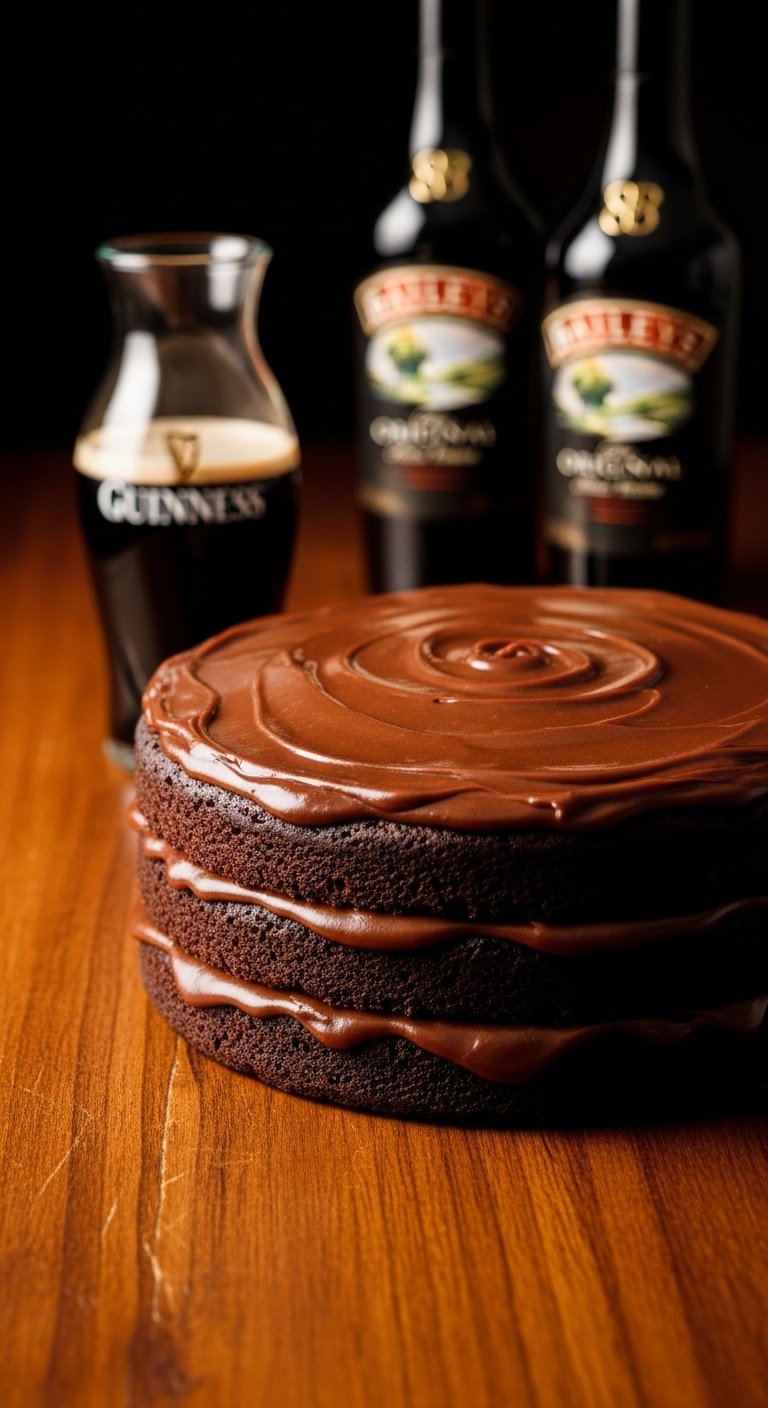
This is a grown-up chocolate cake that blends rich Guinness stout with Baileys Irish cream in a silky ganache. The crumb is moist and slightly fudgy from stout; the ganache adds a boozy, creamy finish. It’s ideal for celebrations or holiday dinners — guests will notice the depth without feeling overwhelmed.
Ingredients
- 2 cups (250 g) all-purpose flour
- 2 cups (400 g) granulated sugar
- 3/4 cup (75 g) cocoa powder
- 2 tsp baking soda
- 1 tsp baking powder
- 1 tsp fine salt
- 2 large eggs, room temperature
- 1 cup (240 ml) buttermilk
- 1 cup (240 ml) Guinness stout
- 1/2 cup (120 ml) vegetable oil
- 2 tsp vanilla extract
- For Baileys ganache:
- 12 oz (340 g) dark chocolate, chopped
- 3/4 cup (180 ml) heavy cream
- 1/3 cup (80 ml) Baileys Irish Cream
Instructions
- Preheat oven to 350°F (175°C). Grease and line two 9-inch pans.
- Whisk flour, sugar, cocoa, baking soda, baking powder, and salt.
- In another bowl, beat eggs, add buttermilk, Guinness, oil, and vanilla.
- Combine wet and dry ingredients until smooth. Divide between pans.
- Bake 30–35 minutes, until a skewer comes out with moist crumbs. Cool 10 minutes then transfer.
- For ganache: heat cream until steaming, pour over chopped chocolate, let rest 2 minutes, stir until smooth, then whisk in Baileys.
- Layer and spread ganache between cakes, reserve some for drip. Chill 20 minutes before slicing.
- Use an instant-read thermometer if you prefer internal temp: around 200–205°F (93–96°C) finished for dense cakes.
- Let cake rest at least 30 minutes after glazing for ganache to set.
How to Serve It
- Serve on a cake stand with a dusting of cocoa and a few chocolate shavings.
- Pair with Irish coffee or a small pour of Baileys.
- Store covered in the fridge for up to 5 days; bring to room temperature for 30 minutes before serving.
- For gifting, wrap slices in parchment and place in glass meal prep containers.
5. Classic Black Forest Cake
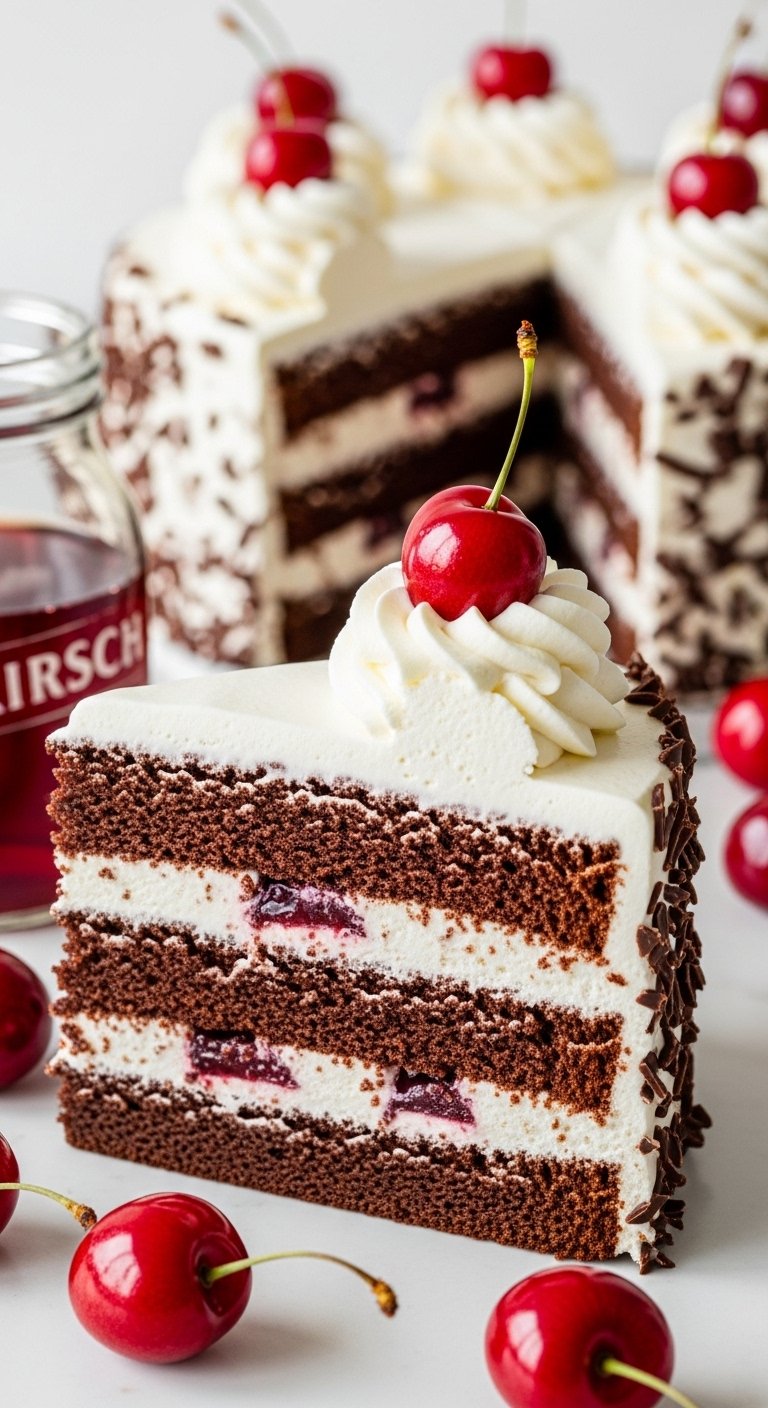
This Black Forest cake keeps the classic chocolate-cherry-whipped cream trio but simplifies assembly for home bakers. Moist chocolate layers, tart cherry compote spiked with kirsch (optional), and light stabilized whipped cream make a crowd-pleasing dessert. It slices cleanly and carries well for dinner parties.
Ingredients
- 1 3/4 cups (220 g) all-purpose flour
- 3/4 cup (75 g) cocoa powder
- 2 cups (400 g) granulated sugar
- 1 1/2 tsp baking powder
- 1 1/2 tsp baking soda
- 1 tsp fine salt
- 2 large eggs, room temperature
- 1 cup (240 ml) milk
- 1/2 cup (120 ml) vegetable oil
- 1 cup (240 ml) hot coffee
- For cherry compote:
- 2 cups (300 g) frozen tart cherries
- 1/2 cup (100 g) sugar
- 2 tbsp kirsch (optional)
- For whipped cream:
- 2 cups (480 ml) heavy cream
- 1/2 cup (60 g) powdered sugar
- 1 tsp vanilla extract
Instructions
- Preheat oven to 350°F (175°C). Line two 9-inch pans.
- Combine flour, cocoa, sugar, baking powder, baking soda, and salt.
- Whisk eggs, milk, oil, and hot coffee together; add to dry and mix until smooth.
- Bake 28–32 minutes. Cool 10 minutes, then remove to racks.
- Cherry compote: simmer cherries and sugar 6–8 minutes until syrupy; stir in kirsch off heat. Cool.
- Whip cream with powdered sugar and vanilla to medium peaks; stabilize with 1 tsp of cornstarch if transporting.
- Assemble: layer cake, spread a layer of compote, pipe whipped cream. Repeat and garnish with whole cherries and chocolate shavings.
- Chill 30 minutes before serving for clean slices.
How to Serve It
- Dust with cocoa and serve with extra cherry compote on the side.
- Pairs well with black tea or a late-harvest Riesling.
- Store in fridge covered for up to 3 days; whipped cream will soften over time.
- Transport on a portable cake carrier for parties.
6. Best Vanilla Cake Recipe (From-Scratch)
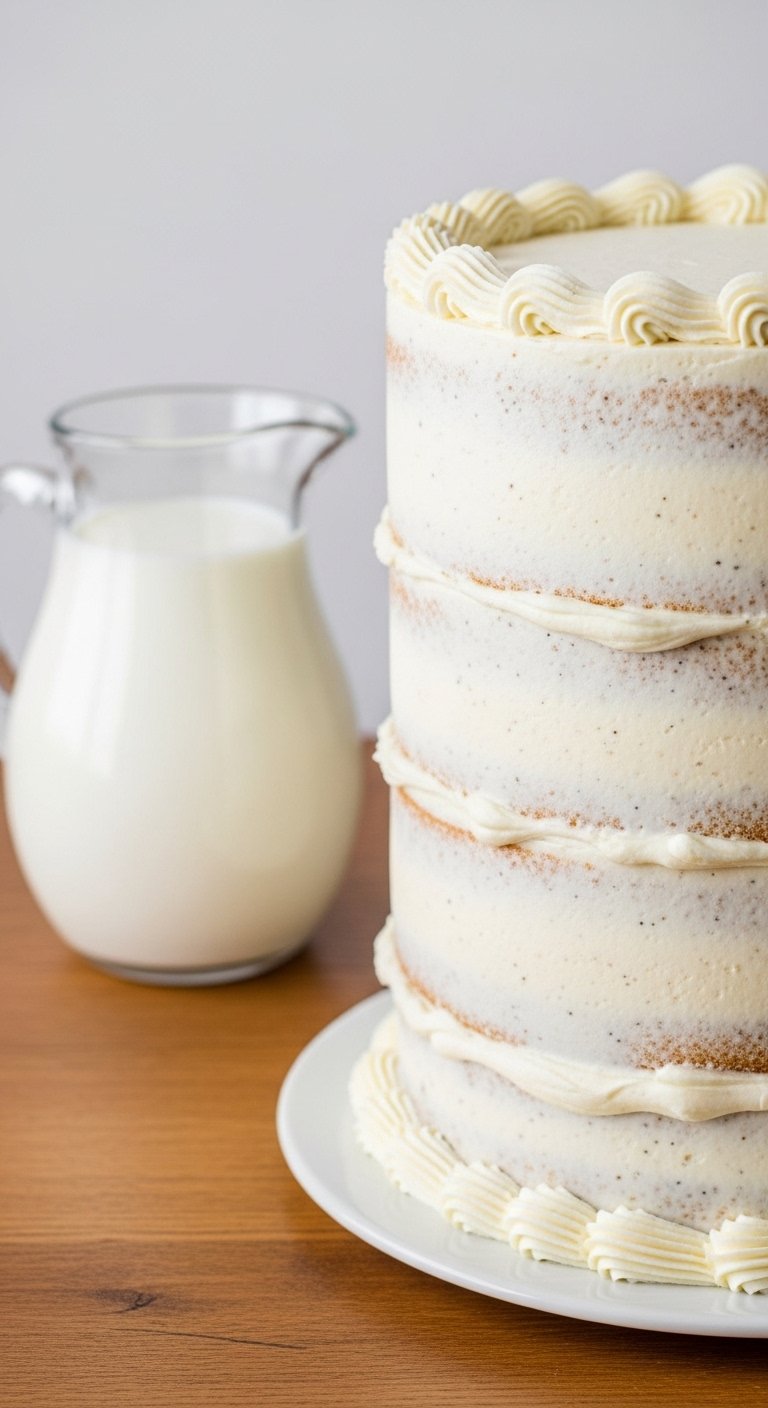
A reliable vanilla cake is the backbone of many celebrations. This recipe prioritizes real vanilla (bean or high-quality extract), tender crumb from cake flour, and a balanced Swiss meringue buttercream that isn’t too sweet. It’s flexible — use it for birthdays, baby showers, or as the base for carved cakes.
Ingredients
- 2 1/2 cups (320 g) cake flour
- 2 1/2 tsp baking powder
- 1/2 tsp fine salt
- 1 cup (226 g) unsalted butter, room temperature
- 1 1/2 cups (300 g) granulated sugar
- 3 large eggs, room temperature
- 1 cup (240 ml) whole milk, room temperature
- 2 tsp vanilla extract or 1 vanilla bean, scraped
- For Swiss meringue buttercream:
- 5 large egg whites
- 1 1/4 cups (250 g) granulated sugar
- 2 1/2 cups (570 g) unsalted butter, room temperature
- 1 tsp vanilla extract
Instructions
- Preheat oven to 350°F (175°C). Grease and line three 8-inch pans.
- Whisk flour, baking powder, and salt.
- Beat butter and sugar until pale and fluffy (~4 minutes). Add eggs one at a time.
- Alternate adding dry and milk, starting and ending with dry. Mix until just combined. Stir in vanilla bean seeds.
- Bake layers 18–22 minutes until edges set and tester shows a few moist crumbs.
- For Swiss meringue buttercream: whisk egg whites and sugar over a double boiler until warm and sugar dissolved (use digital kitchen thermometer to reach about 140°F/60°C), whip to stiff peaks, then beat in butter cubes until smooth. Add vanilla.
- Assemble and crumb coat, chill 20 minutes, then finish smoothing with an offset spatula.
- Allow cake to rest 30 minutes before slicing for cleaner layers.
How to Serve It
- Keep decoration simple: vanilla bean specks, piped rosettes, or fresh berries for contrast.
- Store frosted cake in the fridge for up to 4 days; bring to room temperature before serving.
- Use a serrated cake knife for clean slices.
- Make-ahead: bake layers and wrap in plastic for up to 3 days; freeze up to 1 month.
7. Heavenly Honey Cake
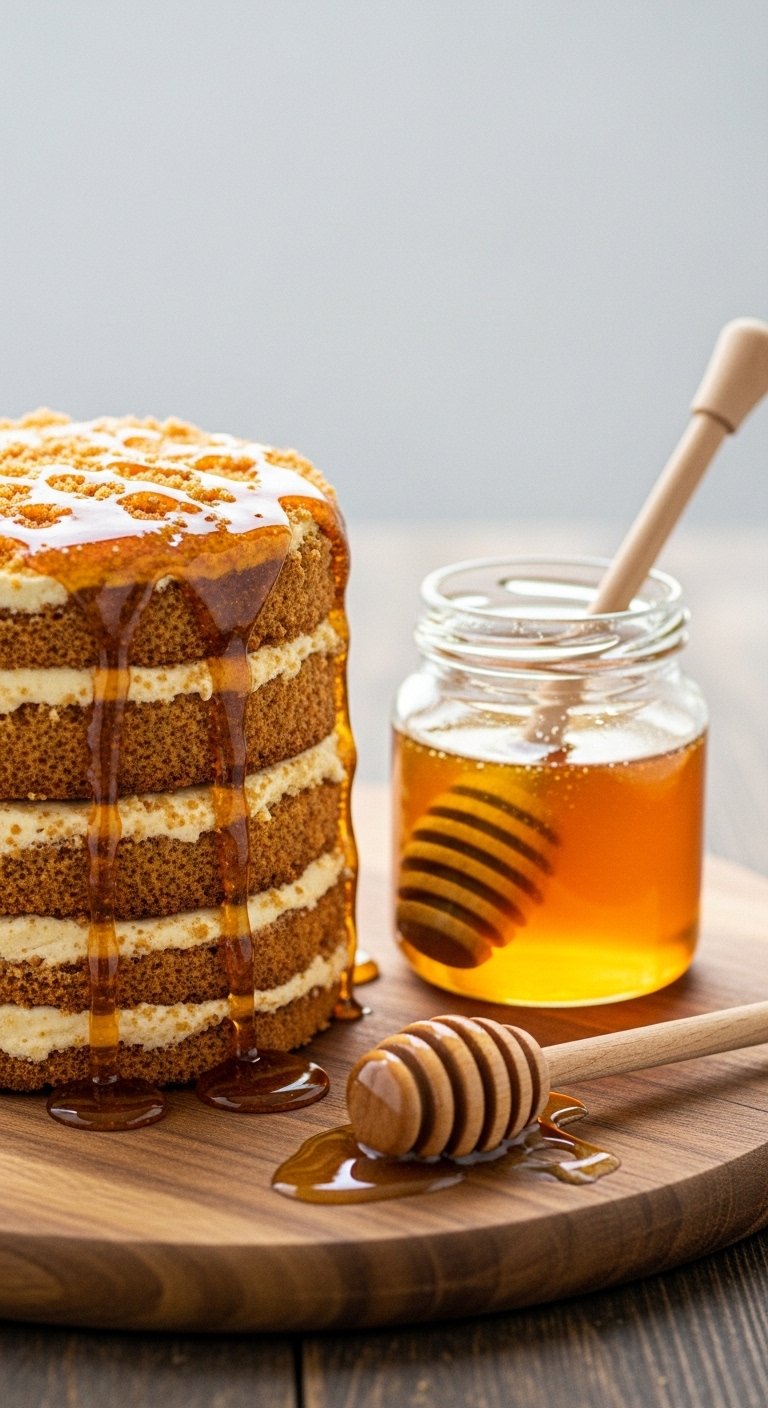
This honey cake is richly flavored with toasted honey syrup and brown-sugar notes that feel festive without being overly sweet. Layers are tender and fragrant, and honey buttercream keeps it balanced. It’s ideal for cozy gatherings and New Year’s menus.
Ingredients
- 2 1/2 cups (320 g) all-purpose flour
- 1 1/2 tsp baking powder
- 1/2 tsp baking soda
- 1/2 tsp fine salt
- 1 cup (240 ml) honey
- 3/4 cup (170 g) unsalted butter, room temperature
- 1 cup (200 g) brown sugar, packed
- 3 large eggs, room temperature
- 1 cup (240 ml) buttermilk
- 1 tsp cinnamon
- 1/4 tsp ground ginger
- For honey syrup:
- 1/3 cup (80 ml) honey
- 1/4 cup (50 g) sugar
- 2 tbsp water
- For honey buttercream:
- 1 cup (226 g) unsalted butter
- 3–4 cups (360–480 g) powdered sugar
- 1/4 cup (60 ml) honey
- 2 tbsp milk or cream
Instructions
- Preheat oven to 350°F (175°C). Grease and line two 9-inch pans.
- Whisk flour, baking powder, baking soda, salt, cinnamon, and ginger.
- Cream butter and brown sugar until smooth, add honey, then eggs one at a time.
- Alternate adding dry ingredients and buttermilk until combined.
- Bake 25–30 minutes until a skewer shows moist crumbs.
- Make syrup: warm honey, sugar, and water until sugar dissolves. Brush warm layers with syrup after removing from oven to lock moisture.
- For buttercream, beat butter until light, add powdered sugar, honey, and cream until spreadable.
- Assemble and chill five minutes between coats; use a cake turntable for smooth frosting if you have one.
How to Serve It
- Garnish with toasted nuts, thin apple slices, or an additional honey drizzle.
- Pairs deliciously with spiced tea or a mellow dessert wine.
- Store in fridge for up to 4 days; keep in airtight containers.
- Make-ahead: bake and freeze layers; assemble the day of for best freshness.
8. Mile-High Pistachio Cake
If you want drama, this mile-high pistachio cake delivers on height and texture. Multiple thin layers are separated by pistachio buttercream and a crunchy nut bresilienne for contrast. Chilling between layers is key, but the result is an elegant centerpiece that tastes as grand as it looks.
Ingredients
- 3 1/2 cups (450 g) cake flour
- 1 tbsp baking powder
- 1 tsp fine salt
- 1 1/2 cups (340 g) unsalted butter, room temperature
- 2 1/4 cups (450 g) granulated sugar
- 6 large eggs, room temperature
- 1 cup (240 ml) milk
- 1 cup (280 g) pistachio paste
- 1 tsp vanilla extract
- For crunch layer:
- 1 cup feuilletine
- 1/2 cup (120 g) nut bresilienne or chopped praline
- For buttercream:
- 2 cups (454 g) unsalted butter
- 6 cups (720 g) powdered sugar
- 1/2 cup pistachio paste
- 3–4 tbsp heavy cream
Instructions
- Preheat oven to 350°F (175°C). Grease and line four 8-inch pans (you’ll stack thin layers).
- Whisk flour, baking powder, and salt.
- Cream butter and sugar until fluffy, add eggs one at a time. Mix in pistachio paste and vanilla.
- Alternate dry and milk until combined. Divide into four pans.
- Bake 15–18 minutes or until tops spring back and a toothpick shows moist crumbs. Cool.
- Make crunch: gently fold feuilletine and bresilienne together.
- For buttercream, beat butter, add powdered sugar gradually, then pistachio paste and cream until smooth.
- Assemble stacking layers with a thin smear of buttercream and a sprinkle of crunch between each. Chill 15 minutes between stacks to stabilize height.
- Crumb coat, chill 30 minutes, finish frosting and press crushed pistachios on the base if desired.
How to Serve It
- Use a sharp serrated knife chilled in hot water for clean tall slices.
- Serve with lightly sweetened whipped cream or espresso.
- Store upright in fridge for up to 3 days; for taller cakes, use a tall cake box/carrier when transporting.
- Make-ahead tip: assemble and freeze for easier transport, defrost in fridge.
9. Matcha-Miso Cake
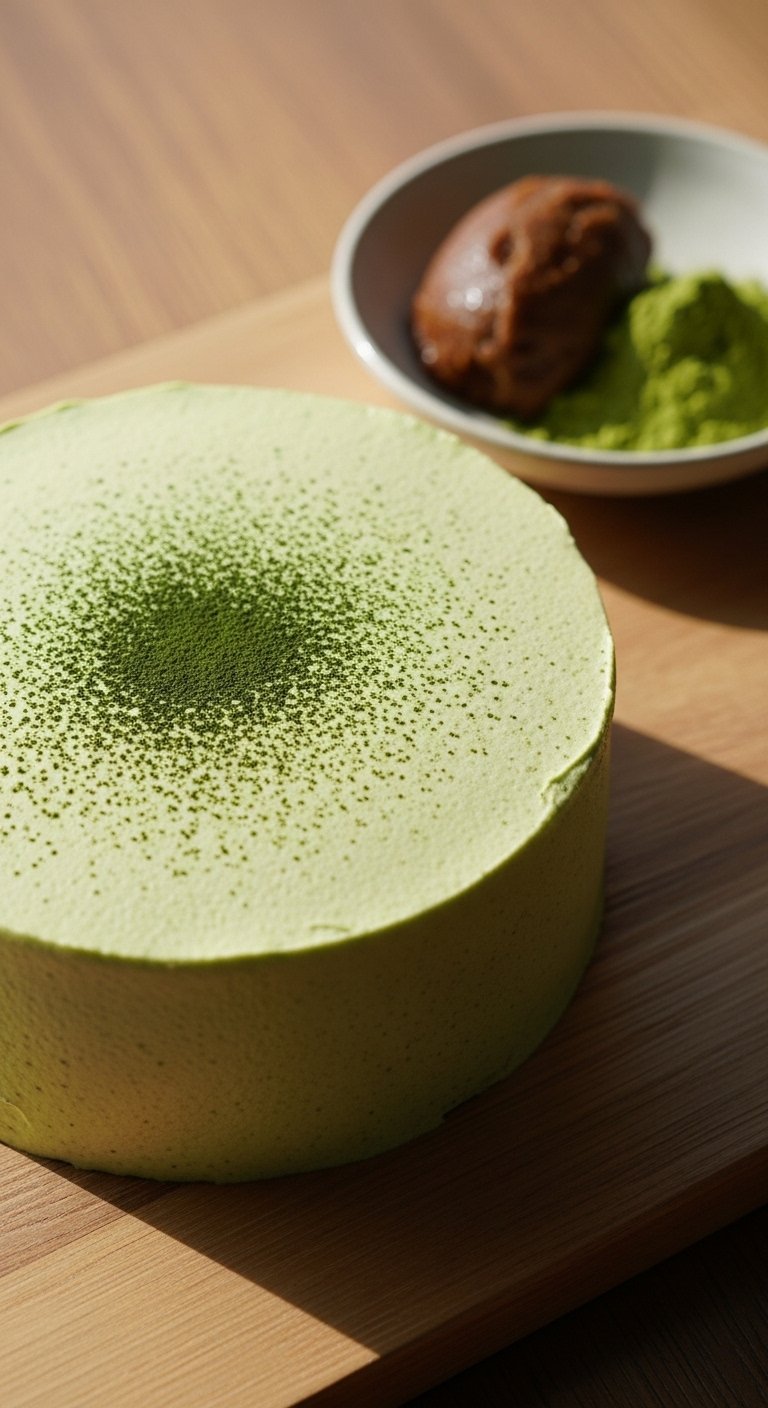
This matcha-miso cake riffs on umami-sweet balance: white miso adds a savory roundness that lifts matcha’s grassy notes. The crumb is tender and slightly caramelized from the miso, and frosting is lower-sugar to keep flavors sharp. It’s a favorite for bakers who like subtle surprises.
Ingredients
- 2 cups (250 g) cake flour
- 1 1/2 tsp baking powder
- 1/2 tsp baking soda
- 1/2 tsp salt
- 1 cup (226 g) unsalted butter, room temperature
- 1 cup (200 g) granulated sugar
- 3 large eggs, room temperature
- 1/2 cup (120 ml) plain yogurt
- 1/2 cup (120 ml) milk
- 2 tbsp matcha powder
- 2 tbsp white miso paste
- For frosting:
- 1 cup (226 g) unsalted butter
- 3–4 cups (360–480 g) powdered sugar
- 1 tbsp matcha powder
- 1–2 tsp miso paste (to taste)
Instructions
- Preheat oven to 350°F (175°C) and line two 8-inch pans.
- Sift flour, baking powder, baking soda, salt, and matcha.
- Beat butter and sugar until creamy, add eggs one at a time.
- Dissolve miso in yogurt and add to wet mixture along with milk.
- Combine wet and dry until smooth. Divide and bake 22–26 minutes until tester shows moist crumbs.
- Cool on racks then level if needed.
- For frosting: beat butter, add powdered sugar gradually, then matcha and small amounts of miso until flavor is balanced.
- Assemble, chill briefly, and finish smoothing with an offset spatula.
How to Serve It
- Garnish with toasted sesame seeds or a light crumble of white chocolate for contrast.
- Pairs beautifully with green tea or a delicate yuzu soda.
- Store in the fridge for up to 3 days in airtight containers.
- Make-ahead: matcha flavor is stable; bake layers a day ahead.
10. Yuzu-Infused Citrus Cake
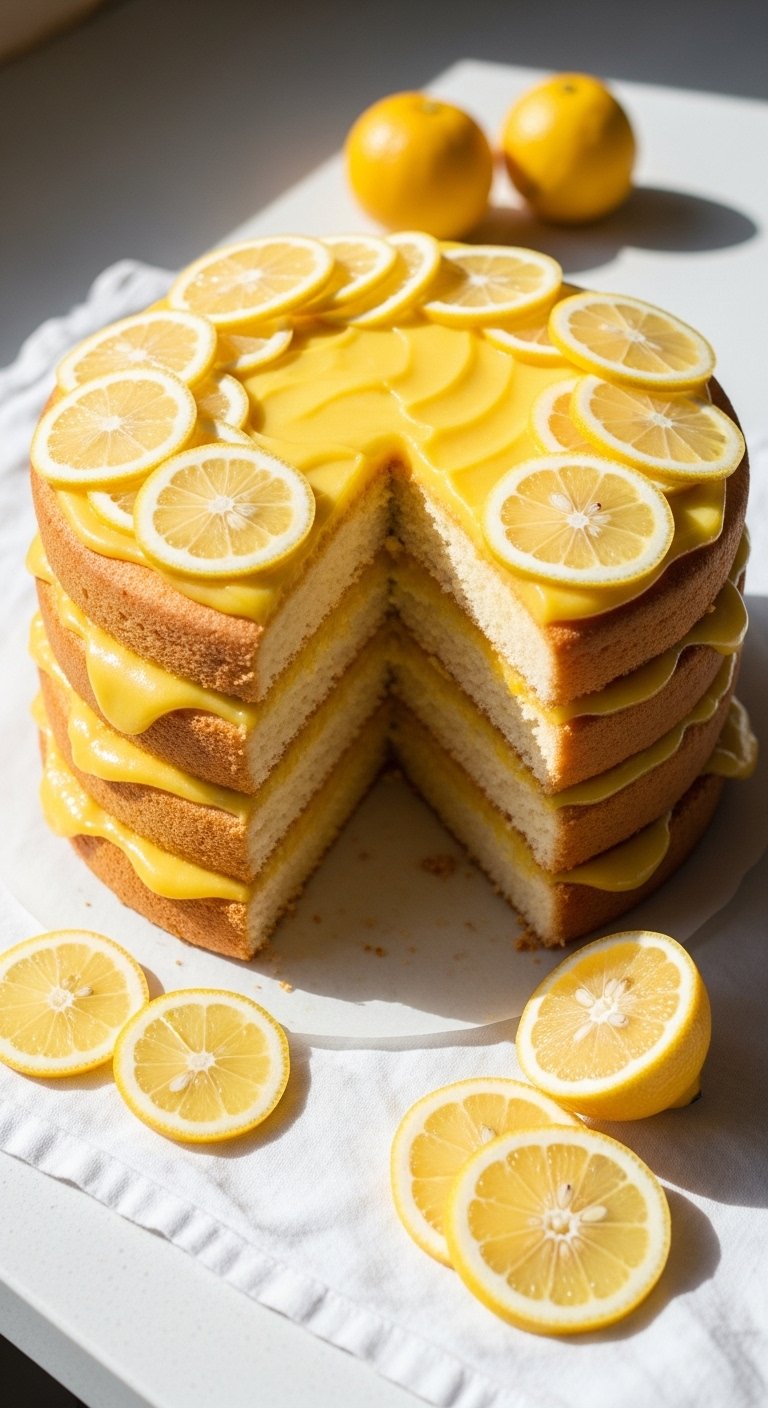
Yuzu adds a distinctive citrus punch that’s more floral and complex than lemon. This sponge is bright and light, layered with a silky yuzu curd and a subtly tangy cream cheese frosting. It’s ideal for spring gatherings or any time you want a citrus-forward Cake Recipe with personality.
Ingredients
- 2 cups (250 g) cake flour
- 1 1/2 tsp baking powder
- 1/2 tsp salt
- 1 cup (226 g) unsalted butter, room temperature
- 1 1/4 cups (250 g) granulated sugar
- 3 large eggs, room temperature
- 1/2 cup (120 ml) milk
- 1 tsp vanilla extract
- For yuzu curd:
- 1/2 cup yuzu juice (or substitute 1/3 cup lemon + 2 tbsp orange)
- 3/4 cup (150 g) sugar
- 3 large eggs
- 6 tbsp (85 g) unsalted butter
- For frosting:
- 8 oz (225 g) cream cheese, room temperature
- 1/2 cup (113 g) unsalted butter
- 3–4 cups (360–480 g) powdered sugar
- 2–3 tbsp yuzu juice
Instructions
- Preheat oven to 350°F (175°C) and line two 8-inch pans.
- Whisk flour, baking powder, and salt.
- Cream butter and sugar until light; add eggs one at a time and vanilla.
- Alternate adding dry and milk, divide into pans, and bake 20–24 minutes.
- Yuzu curd: whisk eggs, sugar, and yuzu in a heatproof bowl over simmering water until thickened (~8–10 minutes). Remove, whisk in butter until smooth, chill.
- For frosting: beat cream cheese and butter, add powdered sugar and yuzu juice to taste.
- Layer cakes with curd and frosting; chill 20 minutes between coats for a neater finish.
- Use a spatula set for precise spreading.
How to Serve It
- Top with thin citrus slices or candied yuzu peel for drama.
- Pair with light floral tea or a citrus aperitif.
- Store in fridge for up to 4 days; yuzu curd keeps well for several days when sealed.
- For gifting, wrap slices in parchment and place in glass meal prep containers.
11. Earl Grey Tea Cake
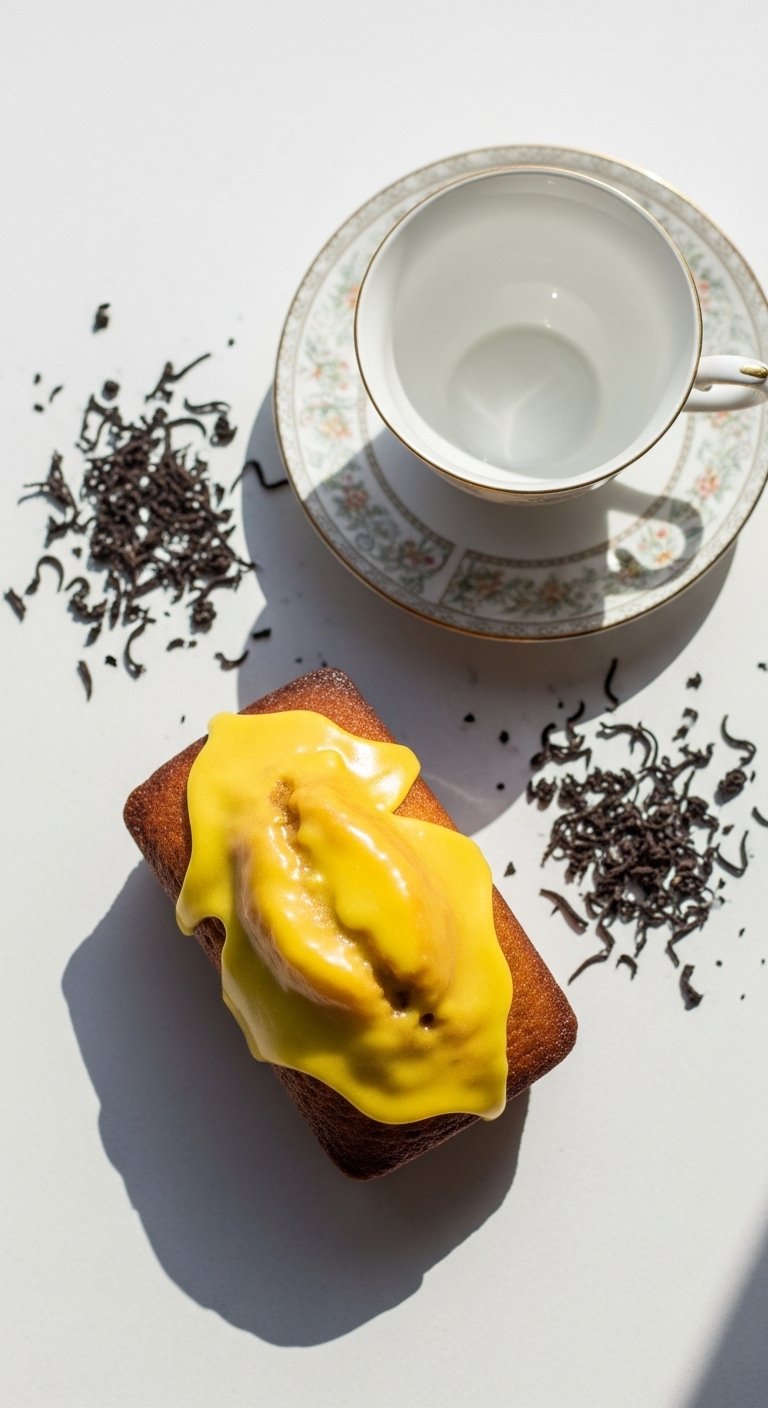
Bergamot-scented Earl Grey brings a classic tea-time vibe to cake. This lightly spiced loaf-style cake is infused with steeped tea and finished with a thin lemon glaze. It’s delicate, aromatic, and a top pick for afternoon gatherings or a refined dessert table.
Ingredients
- 2 cups (250 g) all-purpose flour
- 1 1/2 tsp baking powder
- 1/2 tsp fine salt
- 1 cup (226 g) unsalted butter, room temperature
- 1 cup (200 g) granulated sugar
- 3 large eggs, room temperature
- 1/2 cup (120 ml) milk
- 3 tbsp loose Earl Grey tea leaves or 6 tea bags
- 2 tbsp finely grated lemon zest
- For glaze:
- 1 cup (120 g) powdered sugar
- 2–3 tbsp lemon juice
Instructions
- Preheat oven to 350°F (175°C) and grease a 9×5-inch loaf pan lined with parchment paper.
- Heat milk until steaming, steep Earl Grey leaves for 8–10 minutes, then strain and cool.
- Cream butter and sugar, add eggs one at a time, then stir in cooled tea and lemon zest.
- Fold in flour, baking powder, and salt until just combined.
- Bake 50–60 minutes, until a skewer comes out clean. Cool 10 minutes, then remove to rack.
- Mix glaze and drizzle over cooled loaf. Let set on a wire rack.
- For best flavor, slice after an hour of cooling.
How to Serve It
- Serve thin slices with strong black tea or coffee.
- Keeps well in an airtight container for up to 4 days.
- For parties, serve with lemon curd and candied bergamot peel.
- Make ahead: bake up to 3 days before serving and store chilled.
12. Chocolate Mocha Layer Cake
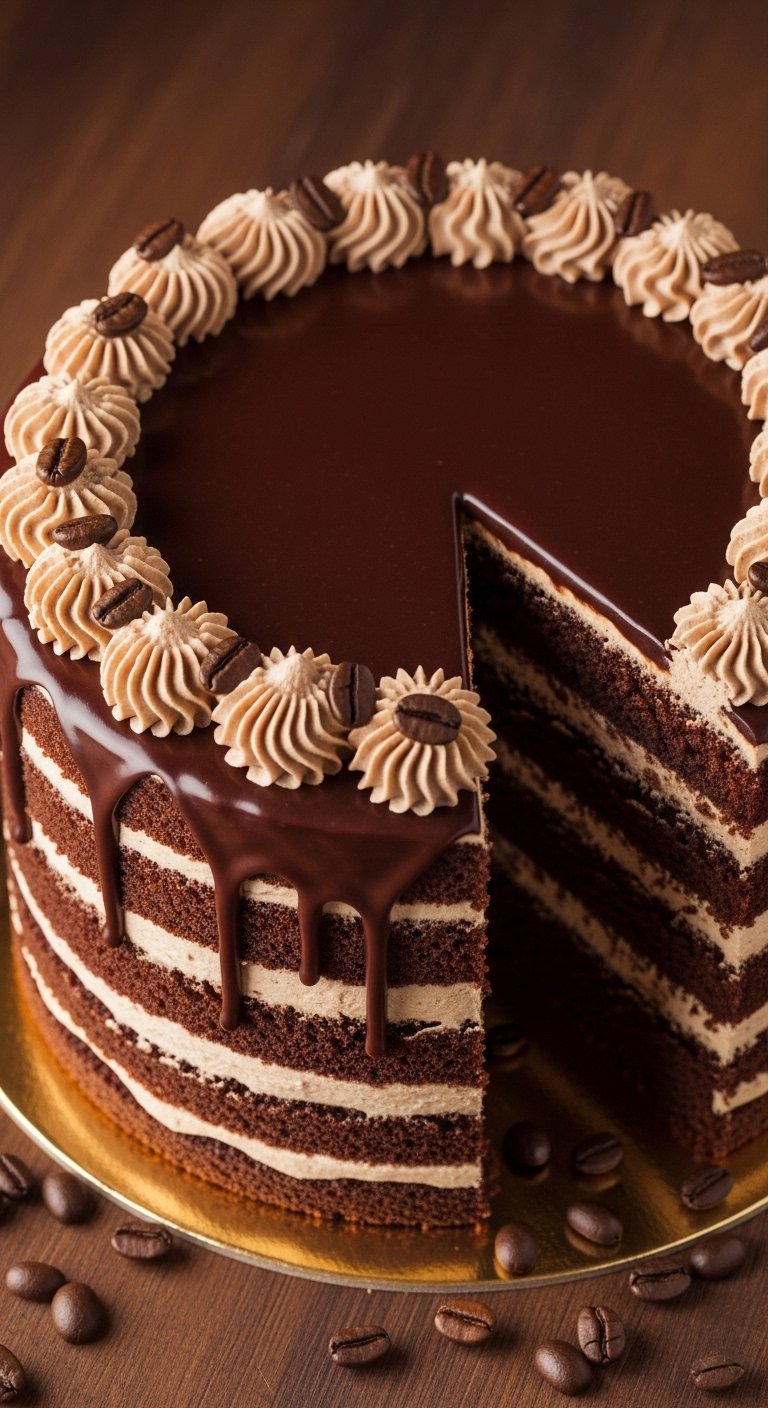
This is a crowd-pleasing chocolate cake with a coffee punch. Espresso powder in the batter deepens chocolate flavor; the mocha buttercream and ganache add a silky finish. It’s perfect for coffee lovers and pairs well with dessert cocktails or a robust cup of drip coffee.
Ingredients
- 2 cups (250 g) all-purpose flour
- 3/4 cup (75 g) cocoa powder
- 2 cups (400 g) granulated sugar
- 1 1/2 tsp baking powder
- 1 1/2 tsp baking soda
- 1 tsp fine salt
- 2 large eggs, room temperature
- 1 cup (240 ml) milk
- 1/2 cup (120 ml) vegetable oil
- 1 cup (240 ml) hot brewed coffee
- 2 tbsp instant espresso powder
- For mocha buttercream:
- 1 cup (226 g) unsalted butter
- 4 cups (480 g) powdered sugar
- 2 tbsp espresso dissolved in 1 tbsp hot water
- 1/4 cup (60 ml) heavy cream
- For ganache:
- 8 oz (225 g) dark chocolate
- 3/4 cup (180 ml) heavy cream
Instructions
- Preheat oven to 350°F (175°C); line two 9-inch pans.
- Whisk flour, cocoa, sugar, baking powder, baking soda, and salt.
- Whisk eggs, milk, oil, hot coffee, and espresso powder together. Combine with dry ingredients.
- Divide and bake 28–32 minutes until a skewer shows moist crumbs.
- Cool, then make buttercream: beat butter, add powdered sugar, espresso, and cream until spreadable.
- Ganache: heat cream, pour over chocolate, let rest 2 minutes, stir until glossy.
- Stack layers with mocha buttercream, pour ganache on top and allow to drip. Smooth edges with an offset spatula.
- Chill 20 minutes before slicing for the ganache to set.
How to Serve It
- Garnish with chocolate-covered espresso beans or shaved chocolate.
- Pairs perfectly with a dark roast coffee or espresso martini.
- Store in fridge up to 4 days in airtight containers; thin slices reheat gently.
- Make-ahead: freeze layers and frost the day you plan to serve.
These 12 Cake Recipes give you a range of textures, flavors, and techniques that work for weeknight celebrations or big gatherings. Try a pistachio layer cake when you want something refined, or the sweet heat chili chocolate cake when guests expect a surprise. Save or pin this collection so you can return when you need a reliable dessert plan.
Wondering which to try first? If you want an all-purpose tool that speeds almost every recipe here, I recommend the KitchenAid stand mixer — it makes creaming, whipping, and frosting so much easier. Which flavor calls your name — nutty pistachio, citrusy yuzu, or a classic vanilla? Share your pick and tag a friend who’d love a slice.

Related posts:
 13 Decadent Dessert Recipes That Steal the Spotlight
 10 No-Bake Desserts That Save You Time and Effort
 7 Addictive Cookie Recipes You’ll Bake on Repeat
 14 Chocolate Dessert Recipes That Melt Instantly
 11 Clean Healthy Snacks That Crush Junk Food Cravings
 9 Crowd-Pleasing Appetizer Recipes for Any Party
 13 Party Food Ideas That Disappear First
 How to Bake Cakes That Rise Evenly Every Time